MIDI to DMX Music Meets Lighting
Turn Your MIDI Controllers Into Lighting Instruments
Live and flexible control of your DMX lighting fixtures with MIDI controllers is now a reality. Lightjams customizes your MIDI to DMX mappings in a very unique and powerful way. Multiple MIDI controllers can talk to Lightjams at the same time, including keyboards, launchpads, pedals and drums. Using backing tracks or click tracks also work pretty well.
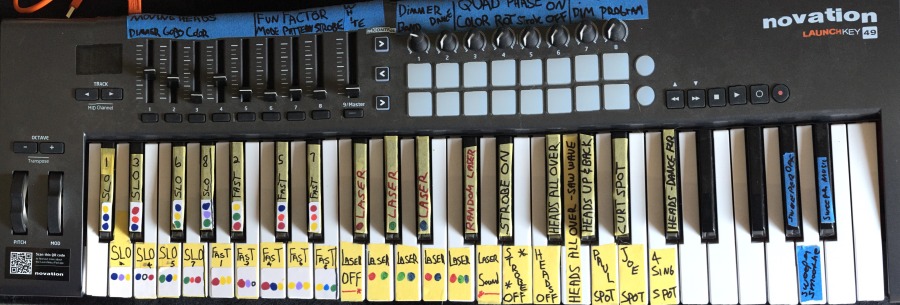
Here's what a keyboard used for the lighting looks like - thanks to Bob Czubiak for the picture:
The great Yeasayer are using Lightjams in their 2016 tour! Nick Foligno from Union Garage Productions in NYC created the whole lighting setup for them. Everything is triggered via MIDI and the band can easily modify and create new lighting scenes using the DAW they're used to. The dedicated MIDI tracks they made for the lighting ensures it's in sync with the music.
The amazing drummer Razor Tongue (Larry Hundertmark) from the band Plague Of Locust made this demo video showing how he uses his MIDI drums (Roland SPD-SX) and Lightjams to trigger lighting effects in realtime. As you'll see, he's fast. I mean really fast. Still, the lights are synced very precisely.
Here's a project by LightUp using 54 DMX universes and two computers running Lightjams. MIDI has been used to keep everything in sync.
Lighting Designer, Nick Foligno from Union Garage Audio designed and ran this light show live to the music of Brooklyn band, The Vandelles. He used a MIDI controller (Akai APC40) to activate cues and designated 'hot' keys for special effects like strobes, floods and fog. Everything is controlled via Lightjams.
Want to play lights with your MIDI controllers? DARE TO LIGHT gives us a nice artistic performance featuring a keytar player controlling lighting through MIDI. The performers play with the lighting as they play music. Lightjams becomes a lighting instrument expanding the possibilities of live performances, freeing artists from having to strictly follow pre-recorded cues.
DARE TO LIGHT also posted a tutorial video showing how to setup the whole thing.
Here's another rehearsal video with a MIDI keyboard and again, some DMX lights and real talent. As you'll see, there's no delay between the time a key is pressed and the lights are activated.
No Delay
The MIDI input is going really fast and can keep pace even with the speediest musicians.
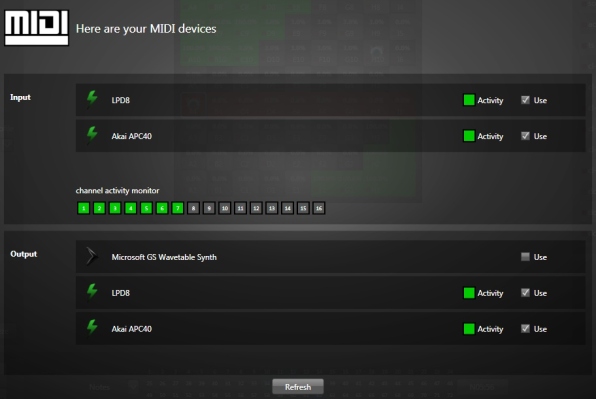
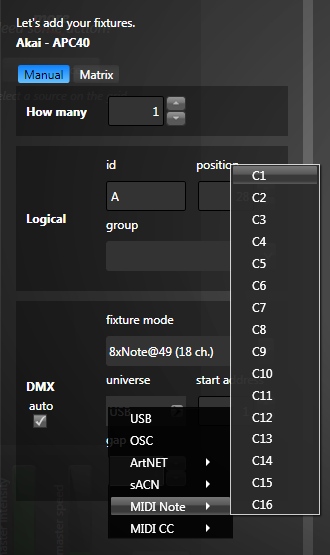
16 Channels of MIDI Notes And CC
Unleash the power of MIDI control and note messages and really control any Lightjams parameters in a few mouse clicks. If remote control is your goal, you'll be served!
MIDI Feedback (Output)
Lightjams can send back the 16 channels of MIDI notes and cc to control other software or generate feedback with your MIDI instruments. The MIDI output configuration is very powerful and you can generate very sophisticated feedback.
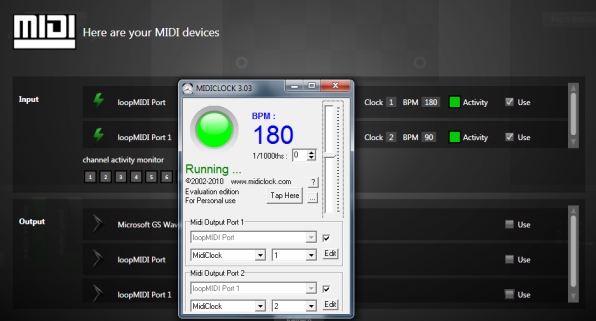
MIDI Clocks & MTC
For precise synchronization, Lightjams can receive MIDI clock messages enabling you to use the BPM info and react perfectly in sync to the beats. MIDI time code (MTC) is also supported.
Unlimited Number of MIDI Controllers
Drum pad launcher, mixer, keyboard, pedal, name it. Lightjams supports it. Create a real jam by letting multiple people play together!