1. Global Configuration
Access the OSC configuration by going to View/Configuration.
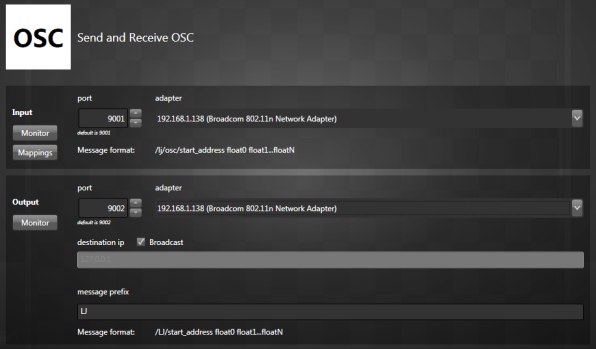
Input:
Network: You can change the default UDP OSC port, which is 9001 and the network adapter if you have multiple.
Monitor: Show all incoming OSC messages with indicators telling whether a message is valid or not.
Mappings: Map any incoming messages. See the next section.
Output:
Network: You can change the default UDP OSC port, which is 9002 and the network adapter if you have multiple. If you want to send OSC messages to another application running on the same computer, you can use the special loop-back adapter (127.0.0.1).
Destination: You can either broadcast by checking the box or send to a unique IP address. You can specify a broadcast address in the IP box if you want.
Format: The prefix is added to all OSC messages. This lets you identify which messages are coming from Lightjams.
Monitor: Show all outgoing OSC messages.
1.1 Learn Mode: Input Mappings
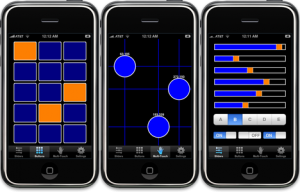
So you have a super OSC application like TouchOSC and want to use its messages in Lightjams? I know, controlling your lights with your Android phone's accelerometer can be so addictive.
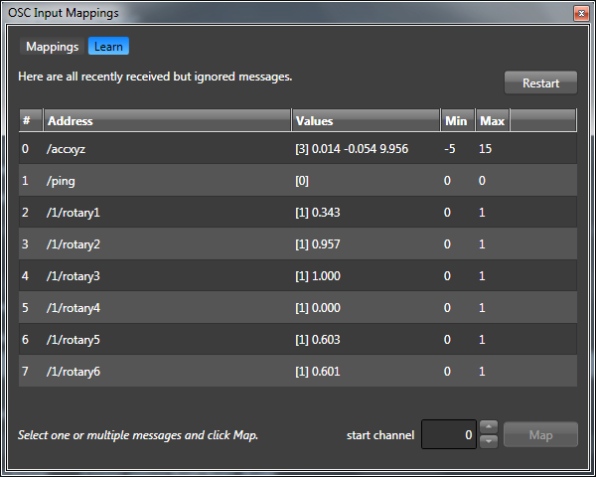
Don't waste time and press the Mappings button. Now make sure your OSC application is properly configured and is sending messages to Lightjams.
As you play with the controls, you should see the corresponding messages appearing in the list. For each message you have this info:
Number (#): Identify the message received order.
Address: Raw OSC address as sent by your OSC application.
Values: The number of values (inside brackets) and the first three values, updated in realtime.
Min, Max: Detected minimum and maximum values. Will be used to scale the values in percent.
Later, you'll access these values by refering to a "channel". You can use up to 512 OSC values. To map a message and all its values, select the channel you want to assign to the first value then select one or multiple messages and click Map.
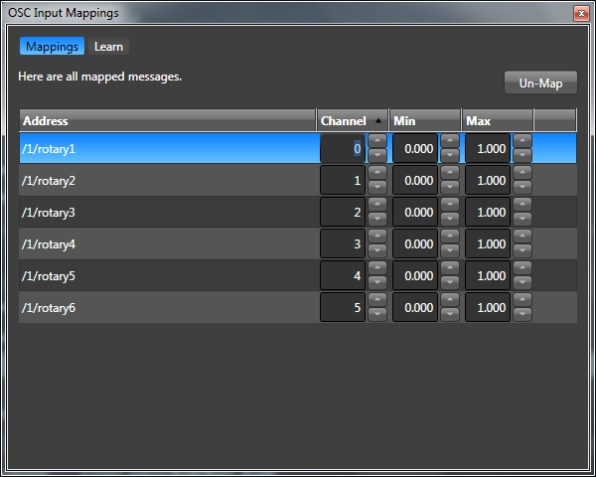
Now that you have mapped your OSC messages, go in the Mappings tab to see the result.
Here you can modify the mappings:
Address: The mapped OSC address.
Channel: The assigned channel to be used in Lightjams to refer to the first message's value.
Min, Max: You can change the min and max manually.
You can select multiple mappings to do group update. For example, you can offset all channels by 1 in one click.
The mappings are saved in your project.
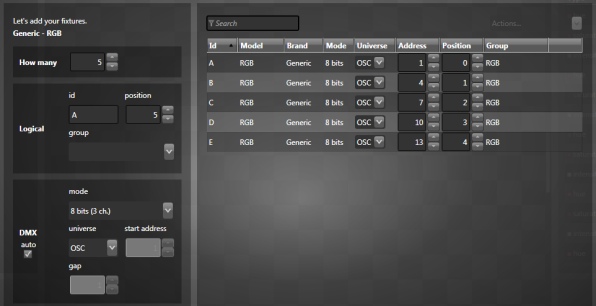
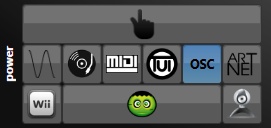
2. Patch OSC Universe
To enable the OSC output, you select the OSC universe when patching your fixtures. The 8 or 16 bits mode doesn't make any difference when using OSC except when a mode adds more attributes.
The start address will be used to create the OSC message for the fixture.
3. Link to any slider
Select any slider and click on the OSC icon. Then you'll be able to play with all OSC settings.
4. Play
OSC Input Values: The viewer lets you see OSC values in realtime and easily choose the value you want. Just click a value to select it.
To enable OSC output, add your fixture attributes on the grid and enjoy! Just remember that the attribute values are sent over OSC and not the DMX values. This means no precision is lost in translation.

5. Message Formats
This is what you need to know in order to send and receive OSC. When referring to a "number", in technical OSC jargon this includes float, double, integer and long.
Input: receive one or multiple values.
/lj/osc/start_channel value1 value2 ... valueN
start channel: The channel of the first value from 0 to 511. This lets you update only a certain portion of the values.
values: Numbers between 0 and 1. You can send one or multiple values at once. The values will appear in percent in Lightjams.
You can also use the input mapping feature to map any OSC address to a channel.
Output: send OSC bundle containing one message per fixture.
/prefix/start_address value1 value2 ... valueN
prefix: This is user configurable. The default is lj/osc.
start address: Start address of the fixture as configured in the patch window.
values: Numbers between 0 and 1. There is one value per fixture attribute. For example: A simple generic dimmer fixture will send only one value and a RGB fixture will send three.
The output message for a RGB fixture patched at address 0 with full red would be:
/lj/osc/0 1.0 0.0 0.0
Ask to send all mapped values. Upon reception of this message, Lightjams will send back all mapped values to the sender.
/lj/osc/sendMeAllMappedValues
For example, with an app like TouchOSC, you could define a button that when pressed would send the sendMeAllMappedValues message to Lightjams. Pressing this button when opening TouchOSC would ensure that TouchOSC has the same values as Lightjams.
On a technical note, Lightjams supports type tags. The output frequency is about 40 frames per second.